



Krishnakumar Subramanian
Amazon.in21 Apr 2019
The table is great. BUT, some important tips for the assembly are missing!! Please read the review. The table is great. BUT, some important tips for the assembly are missing!! Please read the review.
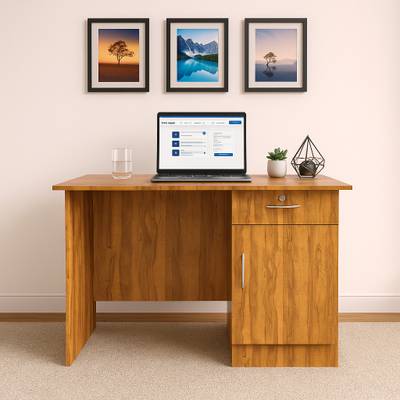
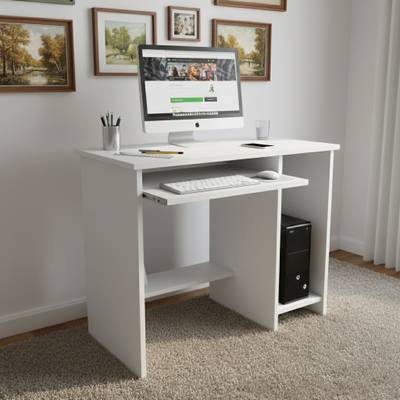
First off, the table is great. The look and feel is good and the table is sufficiently sturdy (you can't expect perfect sturdiness as it is assembled and the wood is engineered!). Overall, great value for the price. But, there are some glaring omission in the assembly instructions which will cause rework (these are detailed below, so please make sure you read them!). The assembly in itself is VERY easy and a great fun project for DIY enthusiasts!! ***First, regarding the table**** Pros: - Sufficiently sturdy for an office desk. Don't expect the sturdiness of carpenter-made hardwood tables. If you want that, head over to the nearest furniture shop. - The table is spacious. The dimensions were correct as shown in the specs and the table physically provides for great workstation space. - The looks are great. The veneer treatment gives it a good classy feel and is not overboard. Cons: - There is no foot rest. Of course, this is obvious from the images but that's something you should be aware of while purchasing it. It would have been a great addition to the table though! - The lock mechanism is essentially useless (this mechanism is pretty standard for all such tables though). And in my case, the lowest drawer does not lock which I suppose is an isolated malfunction. So if you're looking for safety from the lock, this isn't it. But the lock does its basic purpose. - The table's edges are PRETTY sharp, especially on the top panel. So please be careful while you move around it and even during assembly. You might wanna think of doing something about it if you're planning to put it where you need a lot of movement around it. That said, for an average user who's looking for a workstation or a study table, this is a great purchase!! ***Now, regarding the assembly*** All that you need as tools are: 1 screwdriver with a star head and a hammer (not mandatory). Please do not try to assemble with small screwdrivers (or testers!). It'll be really painful on your palms. Spend a few bucks and buy a good quality screwdriver from your local hardware shop. You'll require an Allen key for one of the screws, but it is being provided in the kit itself. It took me about 3-3.5 hours to completely set up the table and it's great fun!! IMPORTANT: All the necessary hardware are provided to the exact number. So be careful not to lose any of them or damage any of them in the process. The holes for screws are perfectly measured and the panels are numbered to make the assembly easy. Coming to the instructions, the steps are not numbered in an optimal way. And some very important tips which are key to the assembly of drawers are not clearly mentioned. So for someone who's not familiar with assembly or is an amateur, you'll find it a bit difficult and might lead to rework. So please read the tips given below once the product has been delivered to you. The step 1, 2 and 3 are that of assembling the drawers. But please do this entire piece at the end before you fix the top panel. You should therefore ideally start with Step 4 and proceed until the step before the one to fix the top panel and then do Steps 1 to 3. The logic is simple, if you assemble the basic structure of the table first, it is easier to visualize the entire thing. Also as per the guide, you fix the top panel and then slot in the drawer which could be cumbersome. Easier way is to slot in the drawers, test the locking mechanism as it may require some adjustments and then fix the top panel. In Step 1, fixing of the correct side panels (left and right side) of all the 3 drawers is VERY critical for the locking mechanism. The mistake DeckUp has done here is that they have not distinguished between the left and right panels for the drawers leading to a big trouble. So, please read below. 1. What you need to look for is two small holes almost along the middle (height wise, the shorter dimension) of the panel and towards one side of the panel (length wise, the longer dimension). This hole should be on the back side of the drawer. You'll be using this to fix a small pin (details in one of the last steps in the guide provided) that will restrict the drawer from coming out of the table when opened. 2. Next, you'll need to fix the panel which has a square slot cut into the bottom of it to be on the RIGHT side of the drawer and towards the front. The slot is where the peg of the locking mechanism goes, so it's critical that this panel is fixed correctly. Once you identify the correct orientation of the side panels of the drawer this way, you can go ahead and assemble the drawer. For reference, please see in the images attached for the one with the drawer - it shows the right side panel and the location of square slot (in bottom front) and the small pinhole at the backside. Also, when you fix the lock make sure that you fix it in such a way that the arm of the lock rotates anti-clockwise. This is also critical for the locking mechanism to work. If someone is saying the lock isn't working,
- Durability
- Value for money
- Build quality
- Ease of use
- Delivery & packaging